
If you are using the mail import feature of Evernote, you can improve this behaviour with Note To Self Mail. The app creates notes in Evernote in seconds.
Setup Note To Self Mail for Evernote
1. Get your Evernote email address
[…] Your Evernote email address is a unique address you can use to save emails into Evernote and looks something like this: username.5199b42@m.evernote.com. To find your Evernote email address, go to your account settings […] as described in documentation.
2. Add your Evernote email address to Note To Self Mail
Add this email address to Note To Self Mail. You can also set the label to “Evernote” or any other descriptive name.
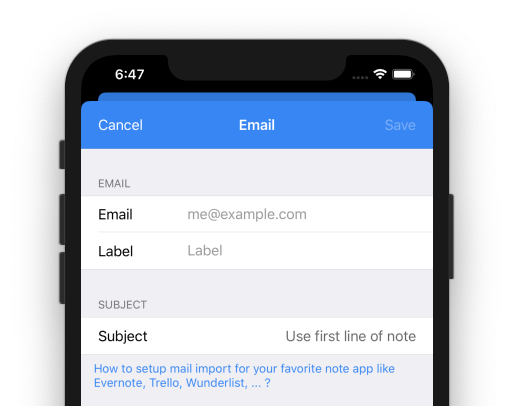
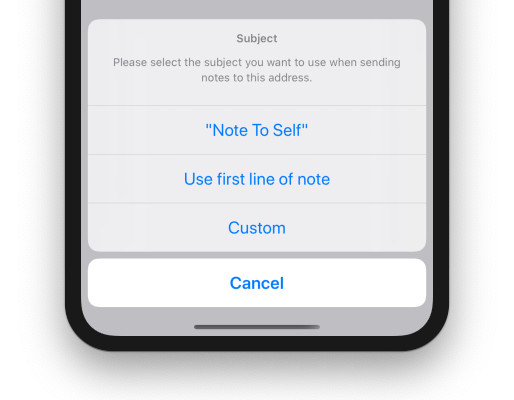
3. Adjust the subject
Evernote uses the subject as a main source of a new note. Set the subject to “Use first line of note”. This ensures, that the first line is used as subject and all the other text lines are moved to the body of the note.
Usage
There are some shortcuts or special chars that can be used in the subject of the mail. All available features are described in Evernote’s documentation: How to save email into Evernote.
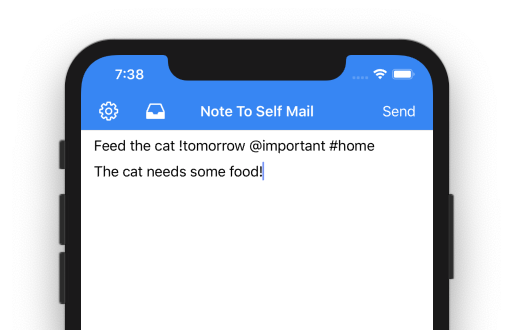
The simplest structure to create a note in Evernote is the following:
[Title of note] ![optional date for reminder] @[notebook] #[tag]
Sending a note with the following text …
… will appear in Evernote as a note …
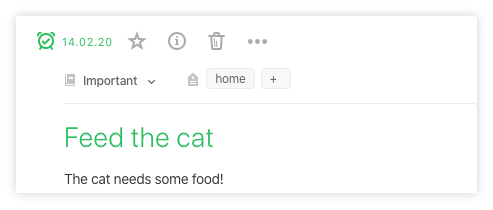
You might notice, that the note got an alert (tomorrow) and was placed in the correct notebook and tagged with “home”. All the other contents of the input (line 2 up to the end) are moved to the notes body. That’s it!
Leave a Reply